PRINT
TAB
To
manage a mind maps effectively, you may need to communicate map
information to a variety of people. With iMindQ®, you can print maps and
charts that present the exact information you want.
The
process of printing the information you need can be as simple
as clicking a button or as refined as customizing and previewing
the existing views. No matter how simple or refined the process,
printing a map or chart consists of essentially the same steps:
 Select
the map or chart that best presents the information you want –
If a predefined map or chart does not meet your exact needs, you
can apply different styles.
 Make
display changes to the map or chart – For example, you may want
to scale information to fit on a single page.
 Preview
a map or chart before it is printed – Previewing a view or report
can help you verify content and display changes you made so you
can adjust them again if necessary.
 Print
the map or chart – To make printing as efficient as possible you
can specify the options you want. For example, you can print multiple
copies.
You
can make changes to the way a printed view or report looks by
specifying page setup options such as page orientation, scale,
or paper size.
Once
you open the Page Setup
dialog, you can follow the steps below to specify the page and
other printing options for a view or a report. Note that some
of the options in the Page Setup dialog available for views may
not be available for the reports.

Some
options may differ between different views as well:
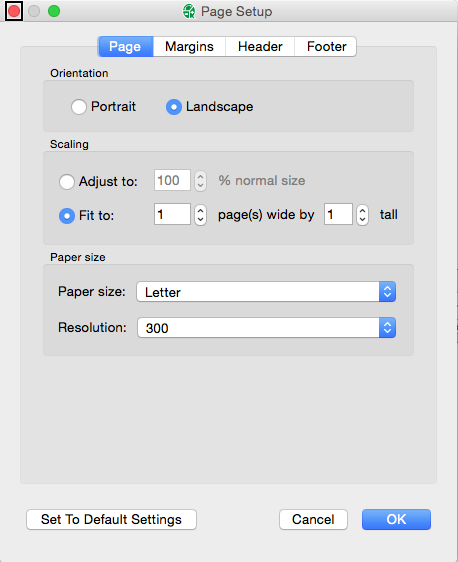
1.
Click the Page tab
in the Page Setup
dialog.
2.
To change page orientation, under Orientation,
click Portrait (vertical)
or Landscape (horizontal).
3.
To scale pages, under Scaling,
click Adjust to, and
then type the percentage at which you want information to appear
on your printed pages in the %
normal size box.
4.
To adjust page fit (some views only), under Scaling,
click Fit to, and
then specify the number of pages you want in the pages
wide by and tall
boxes.
5.
To change the paper size, click the paper size you want in the
Paper Size box.
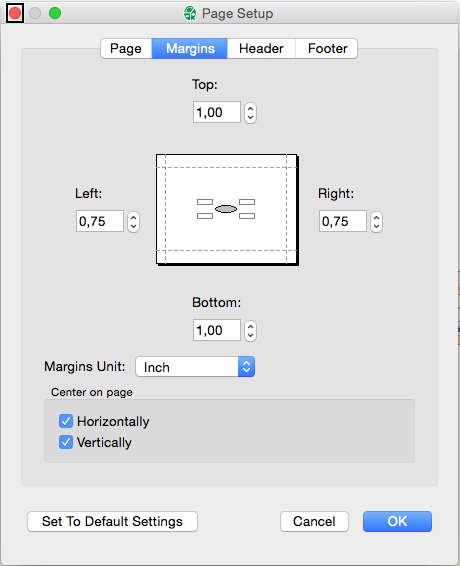
6.
Click the Margins
tab.

7.
In the Top, Bottom,
Left, and Right
boxes, type or select the new margin settings
8. To
place the map in the center of the page, select the Horizontally
and Vertically check
boxes in the Center on page frame.
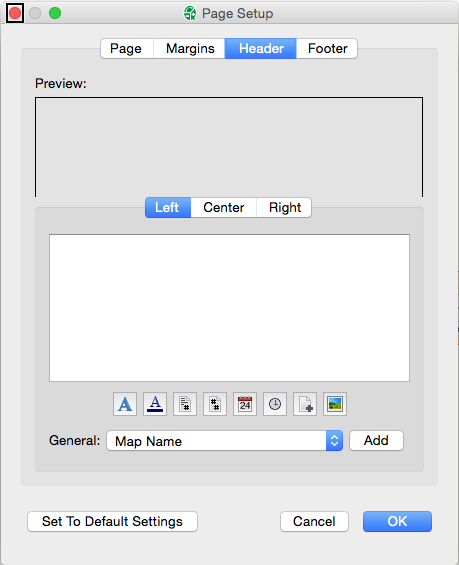
9.
Click on the Header
tab

10.
To select the font of the Custom
header, click on the Font
button
11.
To insert an image in the Custom
header, click on the Image
button
12. To
select the alignment of the header’s text or image, click on the
Right, Center or Left button
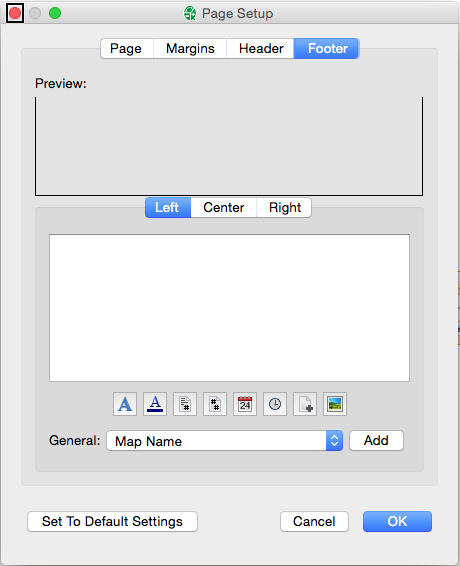
13.
Click on the Footer
tab

14.
To select the font of the Custom
header, click on the Font
button
15.
To insert an image in the Custom
footer, click on the Image
button
16.
To select the alignment of the footer’s text or image, click on
the Right, Center
or Left button.
Before
printing a map or chart, in addition to the page setup options,
you can specify print options such as the printer and its properties,
the print range for pages, the number of copies, and the date
range.
1.
In the File tab, click
on the Print sub-tab.
2. From
the Printer drop-down
menu select the appropriate printer.
3. In the Settings portion of the Print
sub-tab select the page orientation, paper size and the map’s
part (mind map, outline or notes).
4. To print the map or chart click
on the Print button
|